Showing posts with label crafts. Show all posts

Monday, April 15, 2013

Wintery Spring and her Hangout Hoodie

The Hangout Hoodie is comfortable and perfect for the below-temperture Spring we are having this year. 

It is no secret that the weather this Spring has been nothing short of horrible.

I am so tired of being cold, wet, and never seeing the sun. I have become that pregnant lady that is emotional, cranky, tired, sore, and just plain annoying. And I blame it on the weather.

I think the only thing that has kept me sane is my new love for sewing. Yes, I have become a bit obsessed, but honestly it has become my emotional outlet too. I get excited when another project turns out right.

It hasn't been easy for me getting up and down this pregnancy and my energy has been pretty non-existent. So being able to sit and be a little productive has helped pass the my days.

Maisie has obviously been the one who has benefited the most from my new obsession. I love making clothes for her. And with such a cute muse, I just want to keep making more.

Main fabric is Acorns Apple Pink knit
Today I am sharing the Hangout Hoodie by Peek-a-Boo Pattern Shop that I made a few weeks ago.

The knit dress has been perfect for the horrible weather. It is warm enough for the low temperatures, but could still work if the temperatures ever rise about 45 degrees (F).

The pattern calls for either short sleeve or long sleeve with cuffs, but I wanted the sleeve to hit right above her elbow, so that it was not exactly short sleeve or long sleeve, but still was flexible enough for her to move around in.

I wavered back and forth about adding the front pocket, but decided that it looked better with out.

This is just a great simple pattern for a great play-date outfit. I am sure that I'll be using this pattern for years to come.

And seriously, how cute are these two snuggling on the couch together.
Love my babies. 


This post is linked to Trendy TotTrendy Little, and Too Cute Tuesday

Thursday, April 11, 2013

Simple DIY changing table

The dresser is what set the tone for the room. It was my great-grandmother's and I knew
one day it would be in our little girl's room even before we had girls. 

When you are tight on space, it just makes sense to use a dresser as the changing table, or at least, that is what makes sense for me. This long dresser gives plenty of storage for not only our little one's clothes, but for Maisie's and her diapers. It is a functional decorative space that keeps the room together.

Scalloped fabric bunting
To make the bunting, I followed Sew, Mama, Sew!
Scallop Fabric Garland tutorial.
It is quite the trend right now to add bunting to children's rooms. I have seen them used in all different ways and in a lot of different shapes and textures. I guess I am trendy because I knew that a banner hanging on the mirror would be perfect right away. It was actually my first nursery project.

This project was very easy and while I sewed mine, there are plenty of ways to create a garland without sewing a single stitch.

To create the garland, I cut out half-moon shapes of fabric and sewed 2 matching fabrics with right sides together with a simple straight stitch. I turned each piece right-side out and pressed flat. I took purple extra-wide double-fold bias tape and pinned each half moon shape into place. I then used a large zig-zag stitch and top-stitched the garland together.

Small hanging fabric baskets
The hanging baskets are probably one of my more favorite projects in the nursery. One of my biggest pet peeves of our previous changing table was that everything was just thrown into a large basket that sat on the table. I could never find what I was looking for like creams, wipes, etc.

This idea came straight from a Pinterest Pin (see below). The woman found hanging totes at Ikea and hung them on the wall. While hers look great, I knew that I probably could create the same look. So, I again went searching through Pinterest and found this great tutorial on making small fabric baskets. I used white denim for the outside and my coordinating fabrics for the inside. To add the handle, I just added a large button hole on to each folded edge and hand-stitched the handles into place hidden behind the flap.

The top bag holds our cloth wipes; the middle bag holds all my creams and lotions, and the bottom will hold toys for her to fiddle with once I bring a few up from storage.

Minky-striped contoured changing pad cover
Again, changing pad cover tutorials online are a dime-a-dozen. You can find pretty much anything that fits your skill level. I choose this one because it had the elastic exposed. I hate feeding elastic through a casing, so if I can avoid it, than that's what I'll do.

I found several helpful tips online for sewing with minky fabric, which is very stretchy. I highly recommend investing in a walking foot. My machine is great, but not top of the line and eats fabric easily. Having the walking foot, helps guide the stretchy fabric. Also, when cutting your fabric pieces remember to follow the nap of the fabric. It will show up in different lights if the nap isn't going in the same direction.

Little Stuffed Birdy
To add a little decorative touch to the space, I sewed a little fabric bird that she will be able to play with. I found this pattern online, but it was a little too small for my needs, so I just printed it larger. The bird is very simple to sew together, but I had some issues closing the tail where I stuffed it. So to close it up, I sewed ribbon onto the tail, and I think that it actually looks better that way. It gave the bird a nice flipped up tail.

Using the pattern I did, gave the bird a flat belly, so it sits up on its' own. The wing is just appliqued into place with a small zig-zag stitch.

Kind of fun, right?

And of course, I needed to get the kids involved, so I had them paint little bird houses for their sister. It really is the small things in this nursery that make it so fun and personalized. Nothing is perfect, but it all seems to work perfectly together.


Wednesday, April 10, 2013

Sitting Pretty

It is all about the mom when it comes to the cozy spot of the nursery.
Every mother needs a comfortable area to hold their new little one in their nursery. Let's face it, the nursery is for us moms more than the baby. You want to be in a room that makes you happy. The baby will not remember and will not care about any of it, but it will make you happy sitting in a room surrounded by special things as you snuggle your new little one. Especially on the nights that your little is not sleeping, you want to pull your hair out, you are crying, babies crying, etc., you will want to be in a space that gives you peace.

The nursery does that for me. I walk in there and I just feel happy. I sit in the chair where I have nursed all my little ones and feel so calm and rested there. Every project was worth the effort to me.

Today, I am sharing some of my decorative additions that brighten up my space. Again, they are pretty straight forward, but I think each add just the right touch to the room.

Tulip wall hanging
Sometimes deciding what will go in the room is actually already there. These candle wall hangings have been on the wall since basically Bob and I moved in 8 years ago. We have plaster walls and covering up holes is one of the biggest pains to my husband and I, so if something works, we leave it.

These wall hangings matched my "bird nesting" theme, but they need a girl face lift.

I spray painted the bases with 2 coats of silver glitter spray paint. Then, I took the candle holders and painted the insides of each a shade of purple. Then added just some fake white and purple tulips into each cup (real would be nice, but who has time to keep real flowers with 3 under 3 running around).

Easy project requiring little effort and no new wall holes, definitely is the right project for this mom.

Step stool
Sitting the glider is comfortable, but you need to have some where to rest your feet a little off the ground. Since we are tight on space an ottoman is out of the question, so finishing a wood stool worked out perfectly for the space.

I just bought a small unfinished wood stool that you can find at any craft store and painted it a dark purple. I painted a glossy finish to just the top of the stool. I then found these three birds at Michael's in the wood section. The birds are meant to be covered with paper or fabric. I cut scraps larger than the birds and their wings and I Mod Podged them down. After the fabric dried, I took my sharp small sewing scissors and trimmed away the extra fabric. Finally I hot-glued each bird into place.

Bird lampshade
With all the tutorials out there for lampshades, who wants a just plain white one to look at? I went back and forth with how I wanted to decorated the lamp that I bought at Target. I thought maybe fabric flowers, but decided to create a bird scene instead.

This was a time consuming project, but an easy one. It requited fabric scraps, Heat-n-Bond interfacing, templates, scissors, an iron, and a rolled-up hand towel.

First, I adhered Heat-n-Bond to several decent size fabric scraps. Then I took my bird, tree, and leaf templates that I found in "Handmade Beginnings: 24 Sewing Projects to Welcome Baby" and traced my patterns to the fabric. I cut out each shape and organized them on my kitchen counter into a scene that would work on the shade's space.

After figuring out what I wanted and if I needed anything more cut out to make it work, I started adding the shapes to the lampshade. To do this, I rolled up a hand towel and held that on the inside of the shade for pressure against the iron. I followed the directions of the Heat-n-Bond on how to adhere the fabric in place. Remember to turn off the steam when using Heat-n-Bond.

I slowly worked my way around the shade. Placing and ironing and placing and ironing until I was done.

To finish the shade off, I hot-glued purple ribbon around the top and bottom of the shade.

These 3 simple projects, really add a personal touch to our nursery that are one-of-a-kind for our little girl.

I can't wait to finish this space. It is still missing 2 important things. A purple knit blanket that my mom is finishing for our little one and newborn photo to be hung behind the chair once she is here. Both will really make this spot so cozy and calming for those rough nights when no one is getting sleep.

Tuesday, April 9, 2013

Crib's new life


The cover is basically a long rectangle
quilt with ribbons attached into
the seams
There are teeth marks
all over the front rail
of the crib
Adding the strip of fabric was as
easy as it looks, and I think adds the
personalized flare of the rest of the room
Maybe it was only my son, but Calan basically killed his crib over the two years that he slept in it. I swear he was part beaver when he was teething. However, I was not about to buy a third crib for our little one. As Tim Gunn would say, I needed to make it work.

The second I saw a crib railing tutorial on Pinterest (see Pin link below), I knew that was the solution. The tutorial was pretty easy to follow. I did insert some batting in between the top layer and back layer of the cover.

For the crib sheet, I did just plan to buy 2 solid purple sheets from the store, but after seeing how easy some tutorials were online I figured why not. The truth is I accidentally bought too little fabric, so to make 2 crib sheets, I just added a strip down the center of each sheet. I love when mistakes workout better than the original.

Not really sure why, but the second I say the "Let her sleep" sign, I wanted it in her room. It just seemed to so sweet to me. I just wasn't sure how exactly I was going to use it.

This was a simple project, but probably my most expensive single project. I spent $30 to have custom vinyl cut. If you have access to the right tools, this craft would actually be very cheap.


Here's my very simple tutorial for my nursery canvas sign:

Supplies
  • Vinyl cut quote (I designed my sign in Photoshop using Manquis typeface and sent it to Luxe Loft Etsy shop and she created a custom cut for me.)
  • 16 X 20 Canvas
  • Mod Podge or some type of sealer
  • ribbon
  • button
  • fabric scraps
  • needle and thread
  • hot glue and gun
Directions
To me this project is pretty straight forward once you have all the supplies. Carefully attach your vinyl cut out to the canvas. (This was the hardest part. It did not want to stick, so it was a very slow process that was basically letter by letter carefully setting to the canvas.) Because it was not sticking well, once I had the quote in place, I sealed it with Mod Podge so that it would not come off. Then I took the ribbon and hot glued the ribbon in place on the back of the canvas. I made the simple five-point flower following Marie Madeline Studios Festive Posies tutorial. I hot glued the flower and button into place. And ta-da, done.


Wednesday, April 3, 2013

DIY Family Rules


Months ago, Bob and I sat down and decided on what our family rules would be, and it has taken me this long to finally finish the project.

It was one of those projects that I knew kind of what I wanted to do, but wasn't giving myself the time to finish it. I had all the parts, but putting it all together was another story. And there were mistakes along the way that stopped the project.

Moda Hometown Charm Pack by
Sweetwater
This past summer when I was at my mother's, I ran across Moda Hometown Charm fabric squares that I really liked the color combination for our family room. At the time, I had no idea how I was going to use them, but I decided that I needed them for something.

Then, during my MOPS fall sessions, it inspired our family to set up our family rules and our family mission statement. I knew then that my squares would be part of the project, but still didn't know how.

I designed our rules and mission statement in Photoshop and originally thought that I would Mod Podge them to canvas with the fabric squares around them, but that did not work out well. The paper bubbled horribly and it was not looking well at all.
Sometimes mistakes are meant to be. I think
they turned out better in the frames I found
on clearance at Micheal's.

After that, I tabled the project for awhile. We are talking 3 months. It was definitely becoming one of those projects that I thought I would never get done.

But, lucky for me, my nesting instincts kicked in and I needed to get this project done.

I was shopping at Micheal's for some odds and ends for the nursery and ran across some great frames on clearance. I knew right away, that they were just what I had been looking for to complete this project.

The sizes were perfect. The floating 8X10 center with a white mat border gave me exactly what I needed to finish the project.

I love it when you know in your mind what you want and you actually find it and it makes the project better than what you imagined in your head.

I used fabric Mod Podge to prepare the squares of fabric
for the project. Coating them first eliminated fraying
when I cut them for the prject. 
To make this project, I printed out our rules and mission statement on off white card stock, cut them to size, and used double-sided tape to keep them in place in the frames.

Next, I coated my fabric squares with fabric Mod Podge. Doing this first, made it so the fabric did not fray once cut. I then just cut and placed and organized the fabric along the white mat border provided with the frame. Once I liked what I had, I Mod Podged them down.

Even though this project took me months to complete, it was so simple and straight forward once I found all the pieces to make it work.

I love having a clear direction of our family on display where our family spends most of the time.
The frames flank our fire place in our family room. 
What do you think? How do you or would you display your family's rules in your home?

Linking to Thursdays are Your Day @ 52 Mantels

Tuesday, January 8, 2013

Glitter Oatmeal Snowflakes

Simple textured snowflake using craft sticks, glue, glitter, and oatmeal.

This was a pretty simple craft that took all of probably 8 minutes to do with 2 toddler boys who just wanted to play.

I did a bit of prep work to keep the craft simple and quick since the boys would rather play with each other than stop to do a silly mom craft. I hot glued the sticks together and added the ribbon the night before. I also pre-mixed the oatmeal and glitter so that all the boys had to do was add glue to the sticks and shake the snow flake in the glitter and oatmeal.
I hot glued the project together the night before to
make this craft very toddler ready, but you could
easy have an older child use wood glue and glue
them together themselves. 

Both boys said wow as we pulled their completed snowflakes from the oatmeal container, so I think the craft was a success.

Supplies

  • ½ cup of oatmeal
  • 1 teaspoon silver glitter
  • Some type of container with lid (I used an empty oatmeal container)
  • Wood craft sticks
  • Hot glue and gun
  • Ribbon
  • Glue
  • Paint brush

Directions

  • Before craft time, hot glue wood craft sticks together in the shape of a snow flake and add a ribbon loop to the top of one of the sticks. 
  • Putting the snowflake decorations
    in a shakable container made this
    craft basically mess free, and the kids
    loved pulling their creations
     out once they were done. 
  • In empty container, combine oatmeal and glitter. An child can do this part. I just did it to make it easier on the day of the craft. 
  • Have child paint craft sticks with glue and then place in container. Tighten lid and shake (definitely Calan's favorite party). 
  • Take snowflake out and let dry. 
You could use a lot of alternatives to the oatmeal and glitter like rock salt or sugar or sequins. I just had oatmeal and glitter on hand, so that is what we used. I just recommend adding different textures together to give a fun look to the snowflake.

I got this craft idea from 


Post linked @ In Lieu of Preschool

Friday, December 7, 2012

Tis the Season: Handmade Christmas Ornament

The front of an ornament I made for a Christmas party this weekend.
I love that by making my own, I was able to customize it for the event

This is the back side.
I am the first one to admit that I am not crafty and rarely if ever am I able to think of awesome ideas by myself. But thank God for other women, their talents, and the Internet for sharing all that they do.

This weekend, I am attending a Christmas party with my MOPS group that includes an ornament exchange. I searched a few places, but kept coming up empty handed. There are beautiful ornaments out there, but nothing seemed just right.

Then, lo and behold, one of my favorite blogs How to Nest for Less posted a wonderful how-to that very day.
Seriously, all this ornament took was
pre-cut wood, card stock, bells,
ribbon, and Mod Podge.

I went right to work.

I took a piece of pre-cut wood, drilled a hole, Mod Podged cute designs on the front and back, and added ribbon and bells through the pre-cut hole. Viola! Done.

It was super easy and I love how it turned out.

For the images that I printed out on card stock and Mod Podged to the piece of wood, I used these wonderful free Photoshop scrapbooking kits from Scrapbook Ideas. Even the Bible verse design came from Scrapbook Ideas.

I found the pre-cut 4.5-inch wood square (pack of 2) at Micheal's and the bells and ribbon at JoAnn's.

I love this ornament so much. I think I'll be making one for our tree and adding our family Christmas photo to the back.

Tuesday, November 27, 2012

Truth in the Tinsel

This is what my family room looked like last night.


This is where all the mess went to.


What am I doing? I am taking Calan and I on an Advent adventure till Christmas.

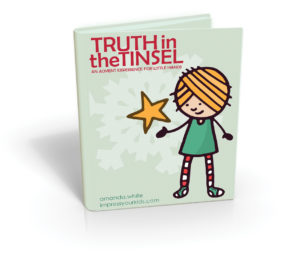
Using the e-book "Truth in the Tinsel", I have created 24 bags filled with ornament crafts and Bible study for Calan and I to do leading up to Christmas.

We will use each bag to learn a little more about Jesus and the Good News of his birth.

After we create the ornament, we will hang it on a small empty Christmas tree that we have. It will be Calan's own little tree to play and decorate.

I hope to do something like this every year with my kids.

Bob will do the Bible study with the kids in the morning before he leaves for work. I printed out the verses from the Good News translation. It seemed the most kid-word friendly.

Each craft looks pretty easy for Calan to handle. I doubt Maisie will be able to do them, so I'll give her some activity to do in her high chair while we are working. I am sure that I will have to help Calan quite a lot, but the end product is never as important as the process. I hope that he looks forward to the different ornaments each day.

We will paint, glue, decorate, color, etc. till all 24 ornaments are hanging on the tree.


Tuesday, November 20, 2012

Turkey Feeders

My finished turkey feeder that I used to show the boys what to do.
I found almost all my supplies at our local Dollar Tree. I got the bird seed
at our local grocery store.
In order to keep busy this winter and to keep from spending too much money on class after class, my friend and I have decided to host a craft play date for our boys twice a month alternating at each other's homes.

My friend hosted the first one at the beginning of the month where the boys put together pumpkins and decorated with stickers. We played and ate lunch together heading home just in time for naps.

Yesterday was my day and we made very simple turkey bird feeders. I just kind of took a few ideas from different blogs and came up with something that was easy and not a huge mess. Our boys are almost 2 1/2 years old. I pre-cut everything the night before so the boys just had to stick it all together.

Here is what I did:

Supplies

  • Plastic container
  • Different color foam sheets
  • Brown contact paper
  • Googly eyes
  • Double stick tape and/or glue
  • Scissors
  • Corn syrup
  • Wild bird seed

Directions

Here are the finished feeders that the boys made.
  • Take the different colored foam sheets and cutout feather shapes, beak, wattle, and feet
  • Take plastic container and place two strips of double sided tape or add glue along one side of the container and stick feathers to container.
  • Take the brown contact paper and cutout a circle for the turkey's face. Stick to front of container. 
  • Add googly eyes, beak, and the turkey's wattle (the red thing).
  • Stick feet to the bottom of the container. 
  • In a mixing bowl combine some bird seed and corn syrup to make the bird seed stick together. I did this so in case a squirrel tips it over, which I am sure will happen, I won't have a huge bird seed mess to clean up. 
  • Place bird seed in plastic container. 
We found a nice spot for the bird feeder on our deck that Calan can watch from our family room. I'm pretty sure the squirrels will destroy the feeder, but it will be interesting to see if any birds stop by this late in the season. 


We did not get reading done, but here are a couple books that Calan
has enjoyed reading about Thanksgiving:
1. "Thanks for Thanksgiving" by Julie Markes
2. "Five Silly Turkeys" by Salina Yoon
3. "This is Thanksgiving" by Harriet Ziefert


Wednesday, August 8, 2012

DIY $3 Dollar Store Wreath


I was pretty excited yesterday when I was at the dollar store and found this great flower and wood wreath combo. I needed something for my front door that wasn't too seasonal, but that was good for the in between times like right now when it isn't fall, but it isn't quite summer still either. 
I didn't want to spend more than $10 for something, and the $3 that this wreath cost me was exactly the right price for me. 


Supplies: 

  • Wood wreath base
  • Fake flowers (I used an off white flower and fake purple wine grape clusters)
  • (Optional) Ribbon 
  • Hot glue gun and sticks
  • Sharp scissors or wire cutters

Directions:

  • Take apart fake flowers into workable pieces. I used scissors to take apart the flowers and the grapes just pulled apart into good-size pieces. 
  • If using ribbon, loosely wrap around wreath. Secure with a little hot glue. I had leftover ribbon from my wedding 6 years ago that I used for the wreath. A perfect compliment that has some meaning to it too. 
  • Place flowers where you would like them on the wreath. I poked them through the wreath to get them to stay and then secured them with hot glue.
  • Do the same with any other decorations. 
What great decorations have you found at a dollar store that you get compliments from guests?